
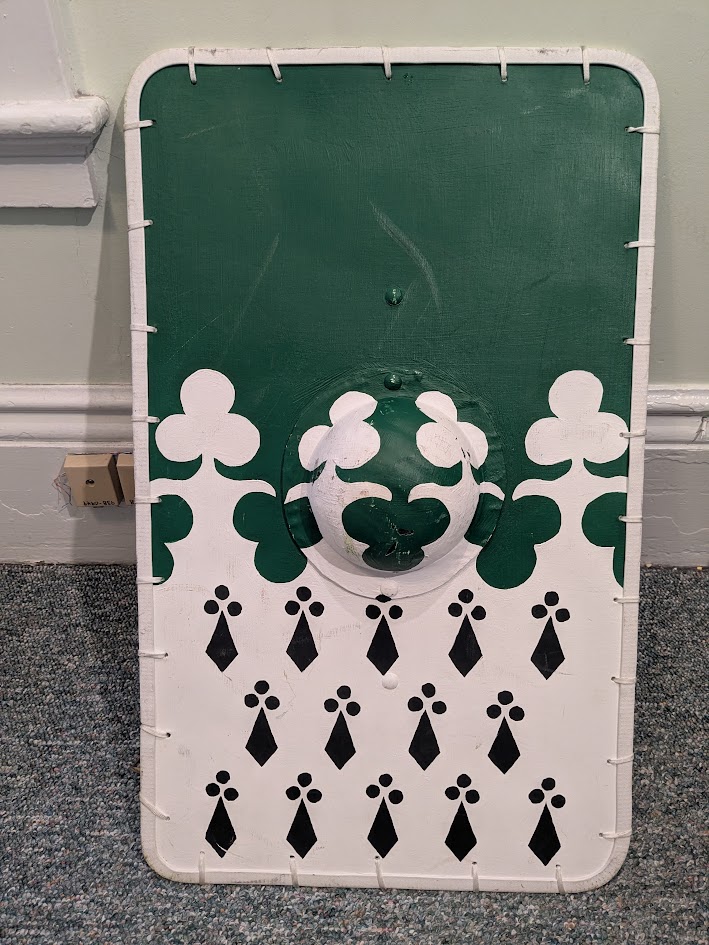
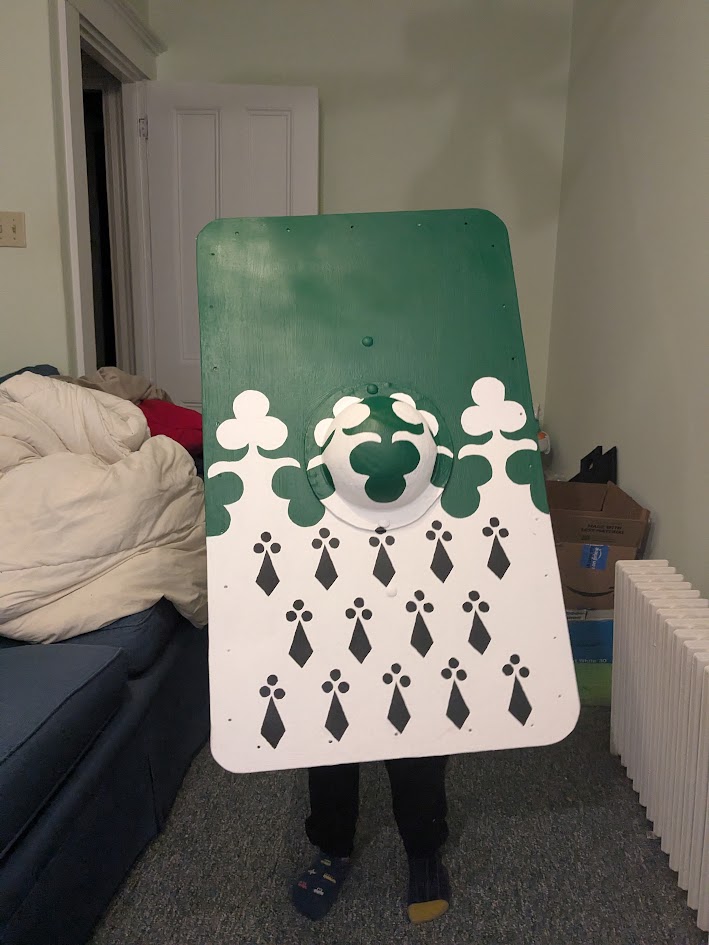
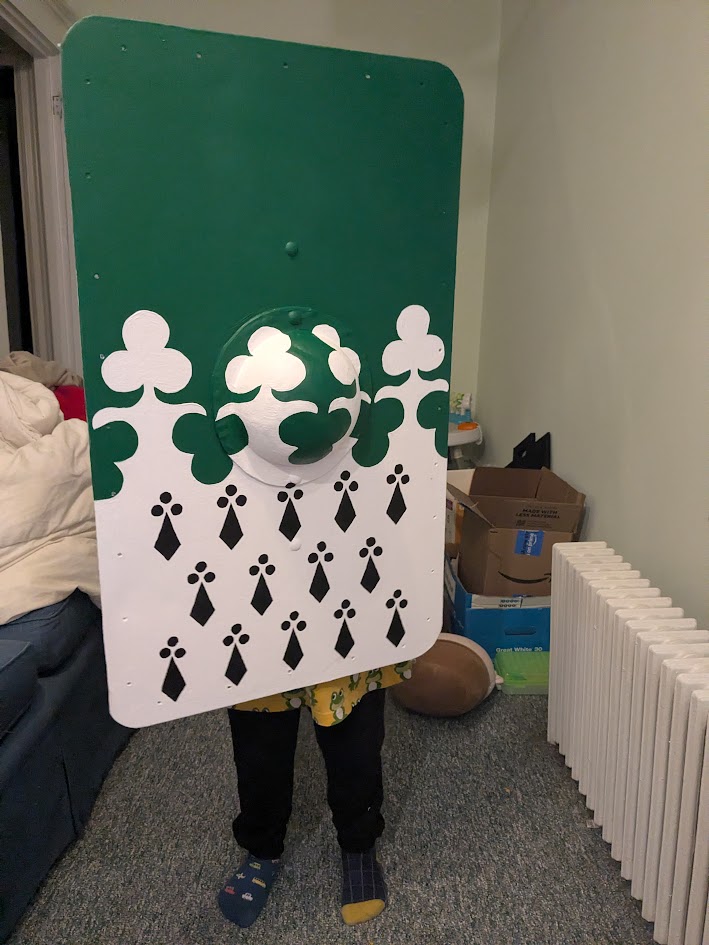
Behold, my newly painted shield! Pictured above after my first bout of melee fighting at Balfar’s Challenge, bearing the first of many scuffs and chips (until someday I repair the whole thing, I assume).
The process of making the shield began with cutting the aluminum sheet down to size, rounding and sanding the edges, and cutting a round hole for the boss (the middle piece), since I prefer a center-grip shield. We drilled holes for the bolts and the lacing. I had immense help during this process from Giles William Trout, called Billy Fish. I absolutely couldn’t have completed this without him, and I am deeply grateful! Once the blank was cut and sanded canvas duck was attached via spray adhesive. Then the boss and handle were attached with bolts. This is the point where the shield was ready for painting!
The painting process began with two layers of gesso. This is a sort of paint that is intended to increase adhesion and decrease visible texture from the surface being painted. Gesso is applied in several coats with different directions of brushstrokes, then sanded down to create a perfectly flat surface. (In my case I did a halfway job sanding, so the brushstrokes are still visible. It won’t matter much on the field.)
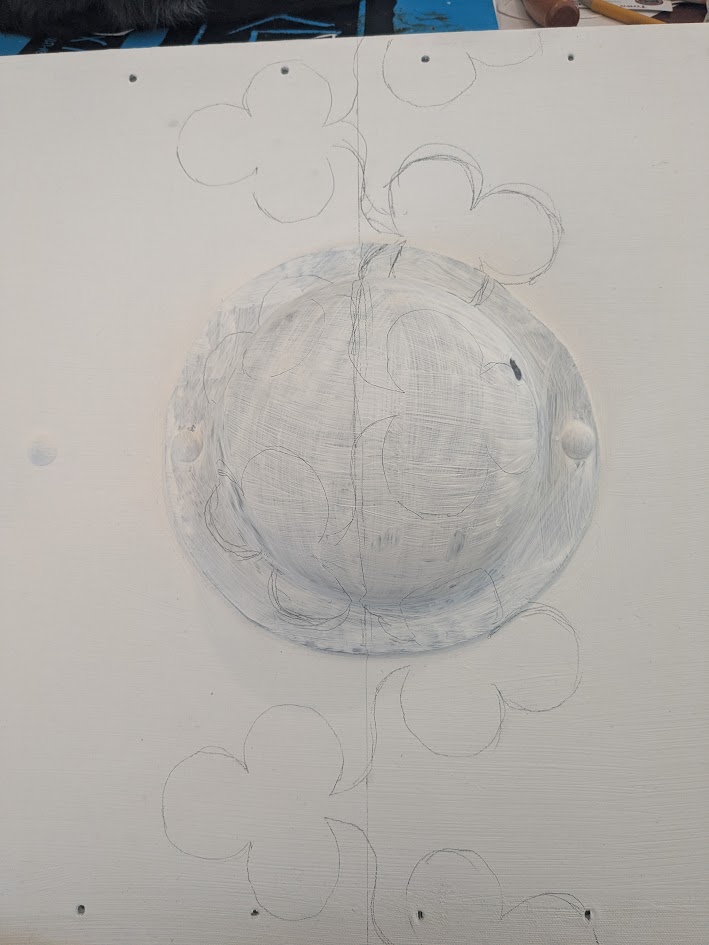
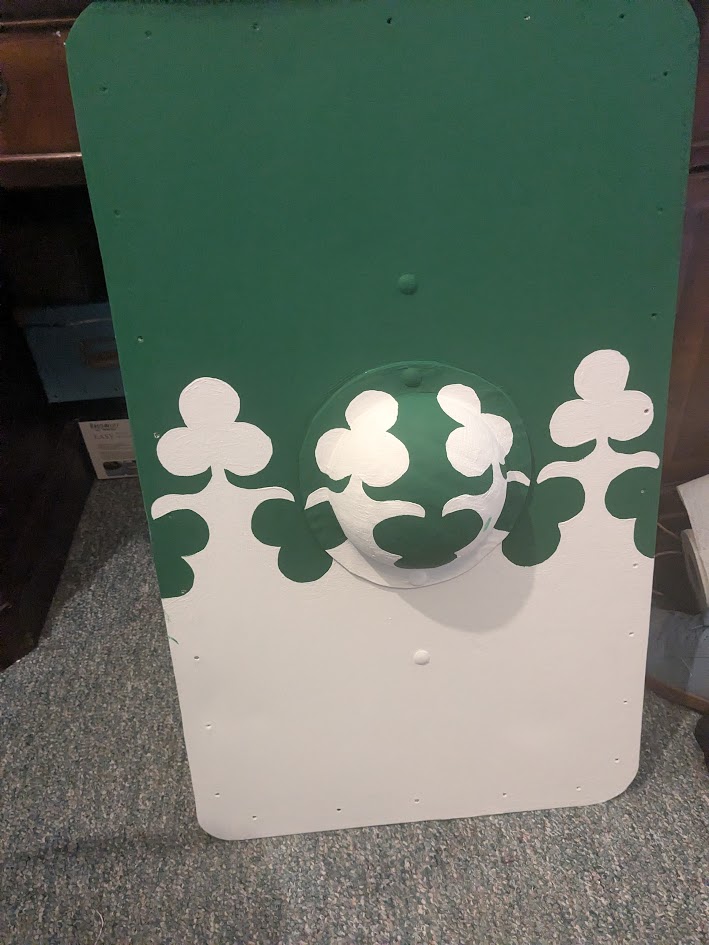

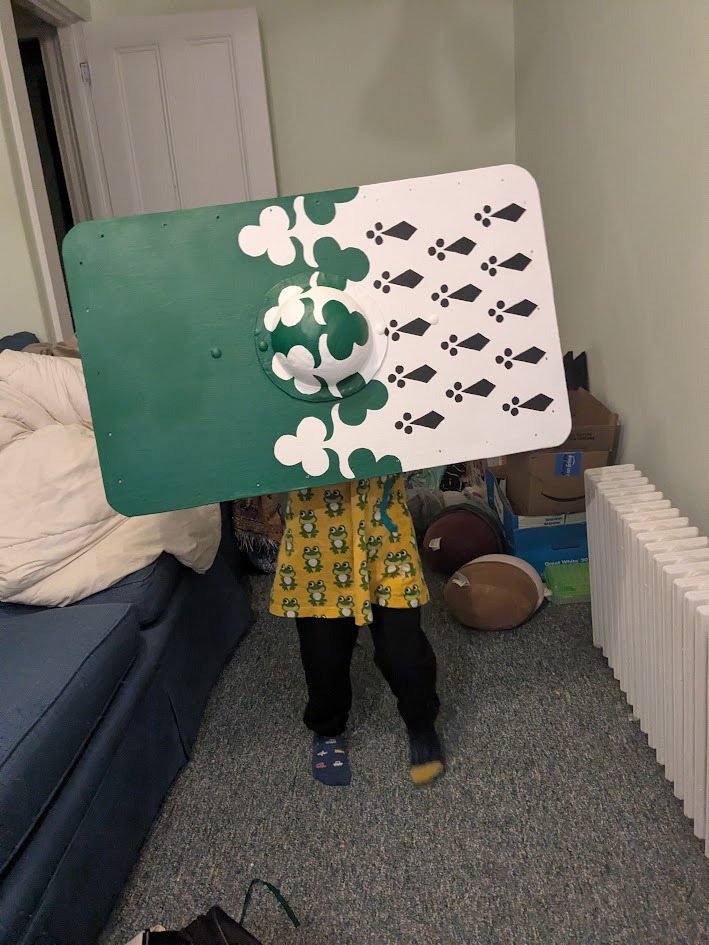
The dividing line of my heraldry was stenciled on. I cut out one trefoil from cardstock, which allowed me to bend it over the curves of the boss. Then it was just a matter of painting several layers of green and white until the blocks of color were totally opaque and the dividing line was even and neat! The ermine spots went on last (I’m partial to this shape, but there are many, many acceptable representations of ermine spots). A layer of matte sealant was sprayed on to finish. Mægwynn filia Brun showed me how to strap on the shield edging with my matching paracord (by doing a considerable amount of the work, because she is very kind).
As you can see, the finished shield is light enough to be carried by a child! I’m looking forward to carrying it into many battles.

Leave a comment